ImagineFX / October 2006
Artist Insight Series: Faces & Features
Introduction
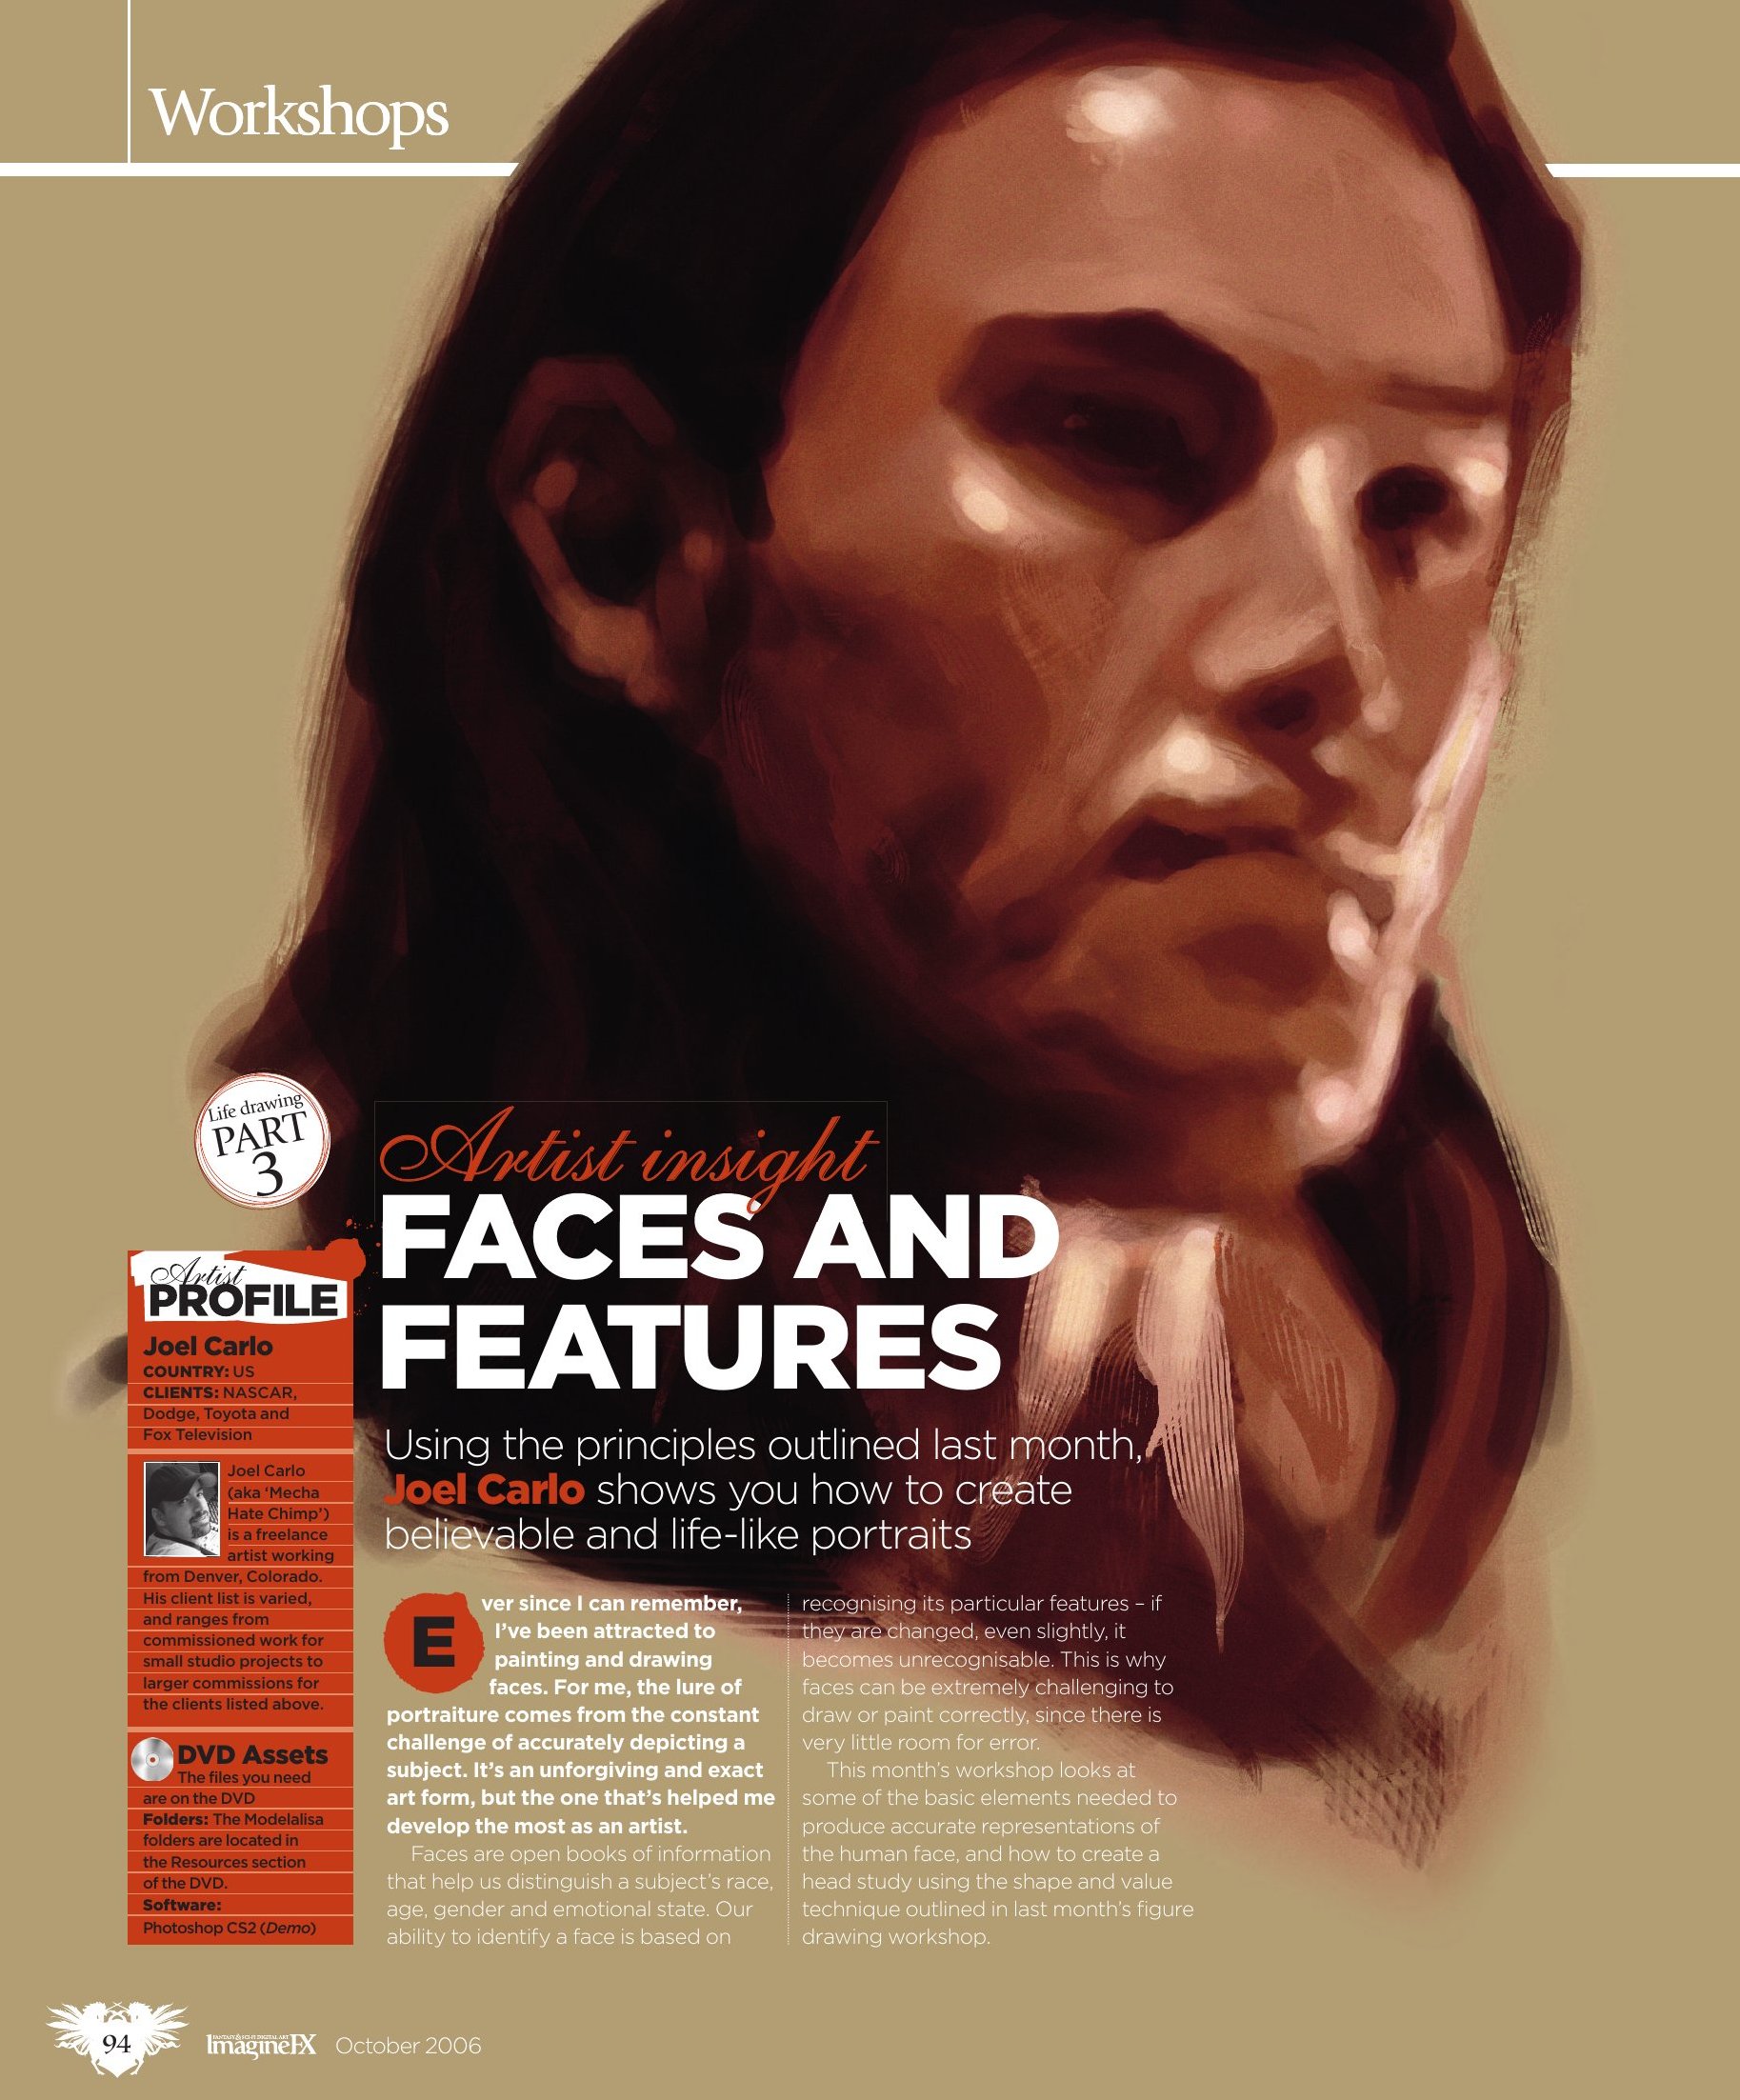
Ever since I can remember, I've been attracted to painting and drawing faces. For me, the lure of portraiture comes from the constant challenge of accurately depicting a subject. It's an unforgiving and exact art form, but the one that's helped me develop the most as an artist.
Faces are open books of information that help us distinguish a subject's race, age, gender and emotional state. Our ability to identify a face is based on recognizing its particular features - if they are changed, even slightly, it becomes unrecognizable. This is why faces can be extremely challenging to draw or paint correctly, since there is very little room for error.
This month's workshop looks at some of the basic elements needed to produce accurate representations of the human face, and how to create a head study using the shape and value technique outlined in last month's figure drawing workshop.
1. Anatomy And Structure
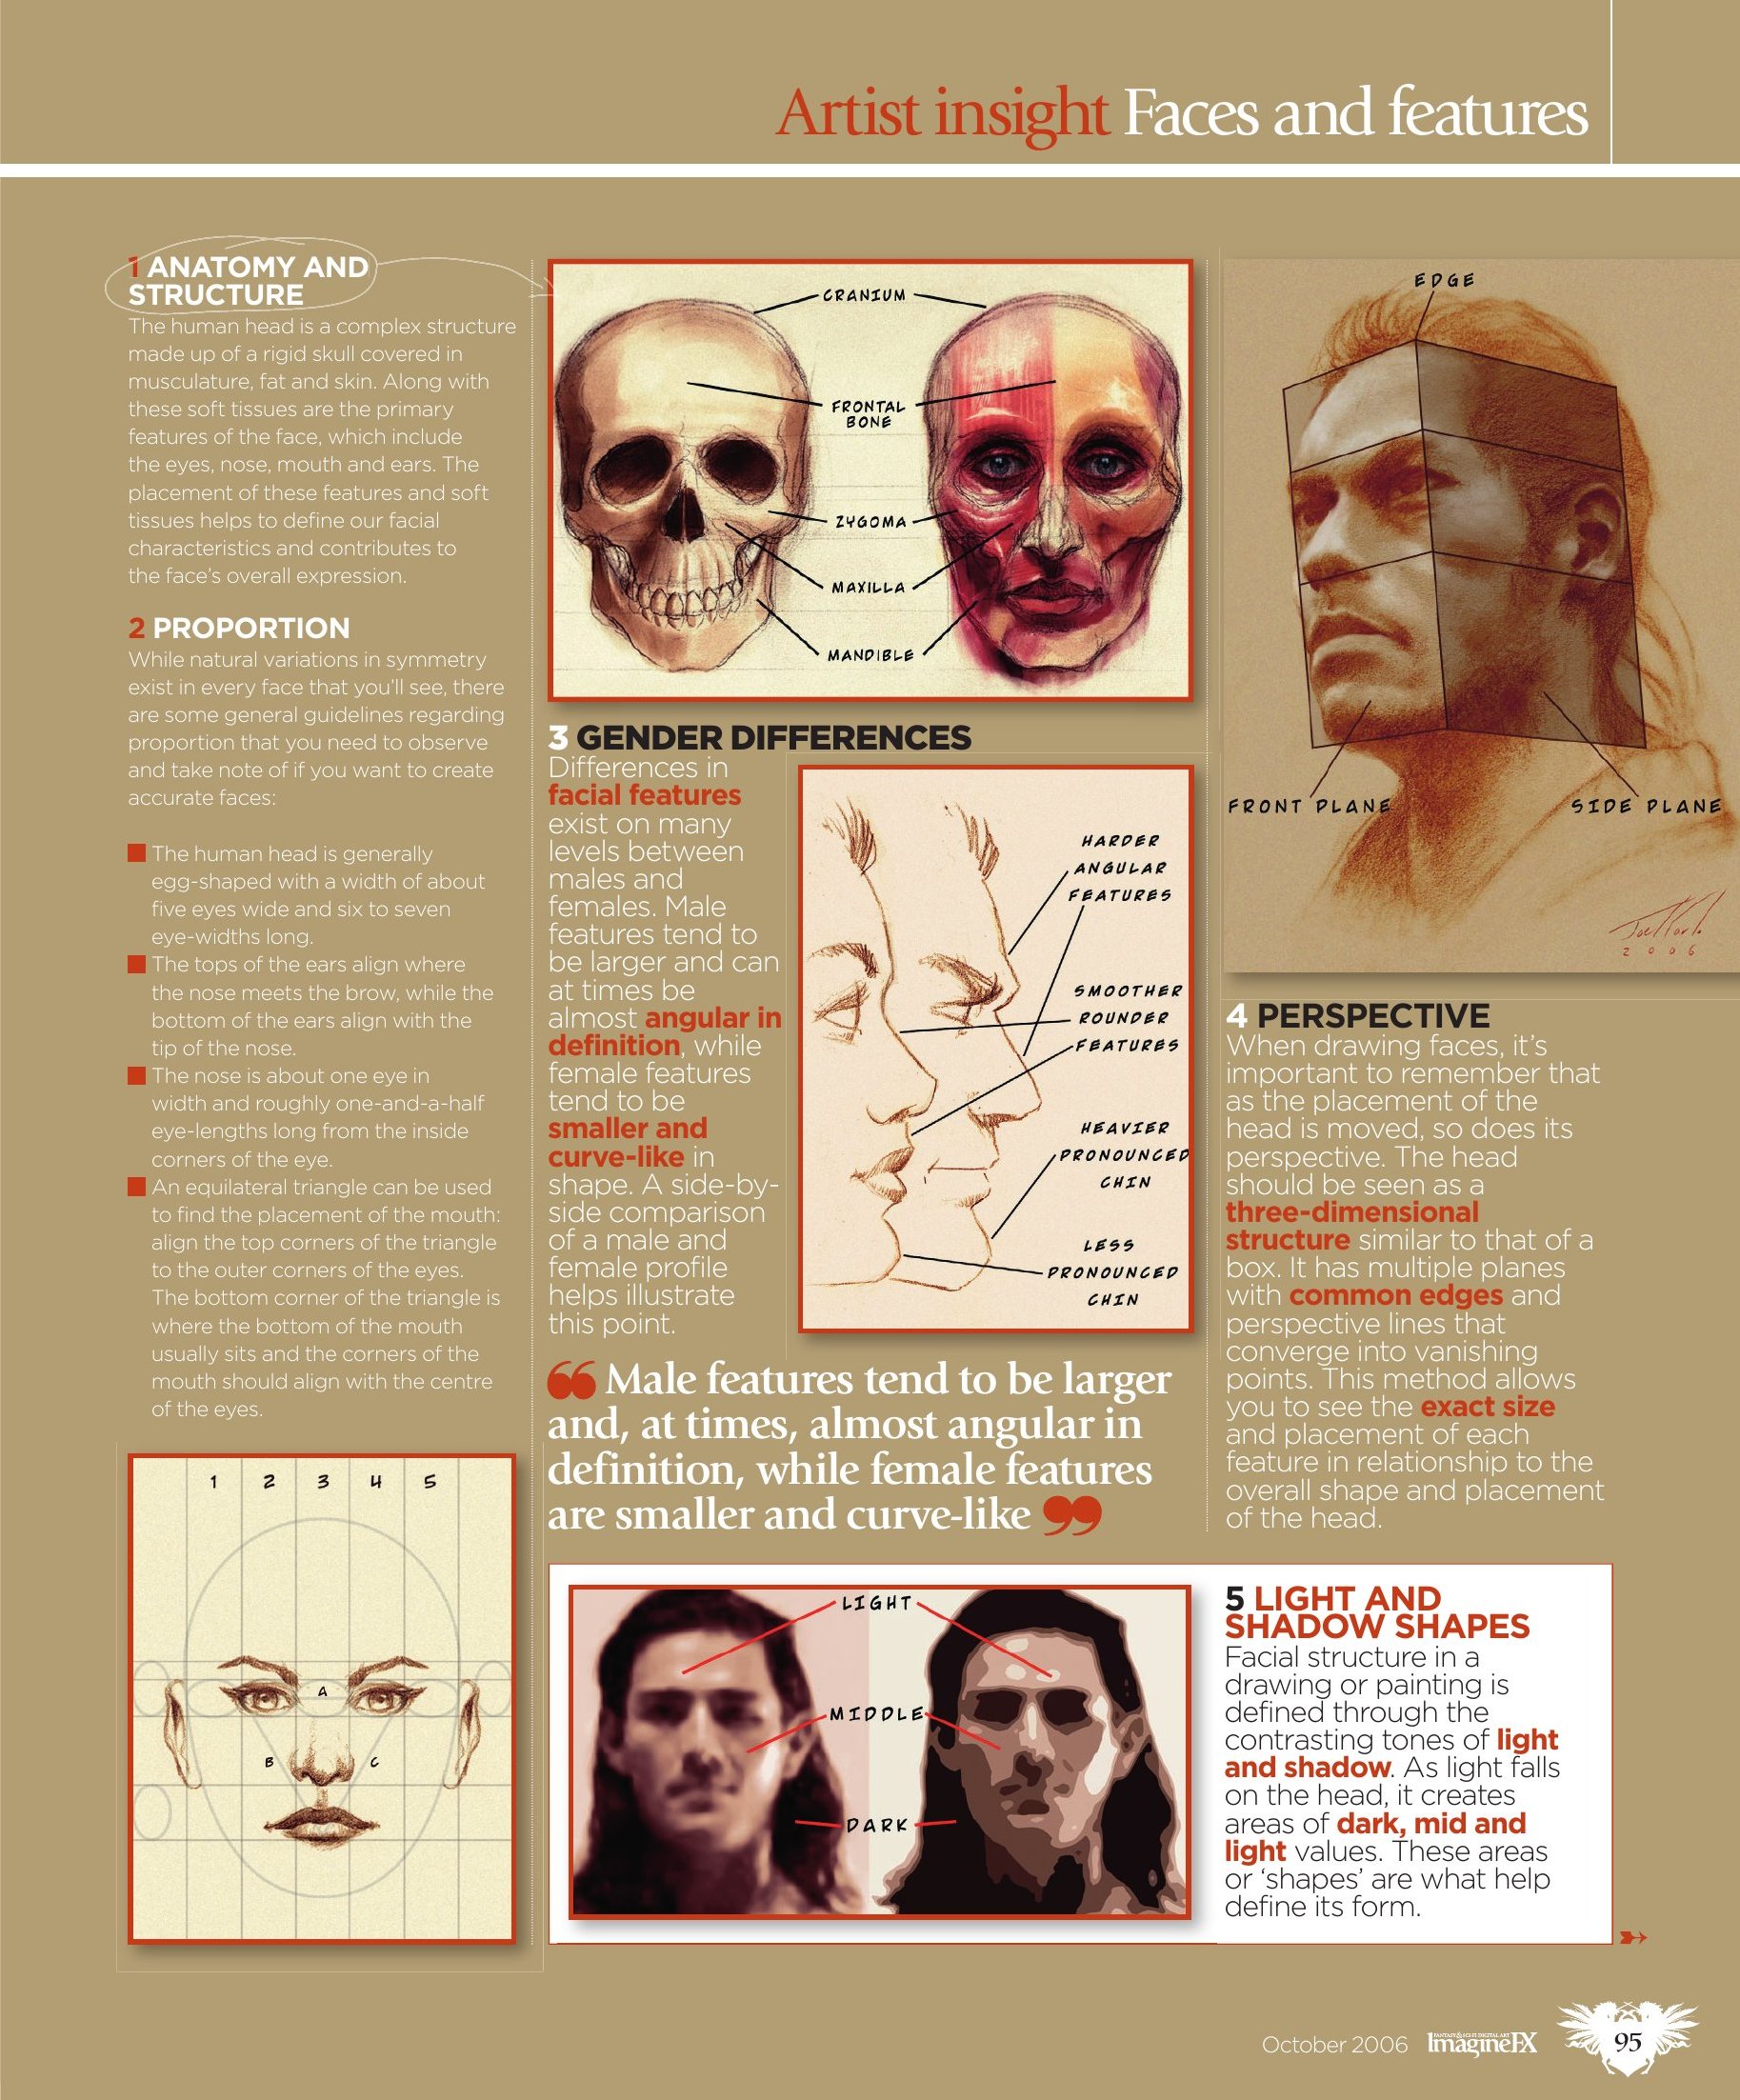
The human head is a complex structure made up of a rigid skull covered in musculature, fat and skin. Along with these soft tissues are the primary features of the face, which include the eyes, nose, mouth and ears. The placement of these features and soft tissues helps to define our facial characteristics and contributes to the face's overall expression.
2. Proportion
While natural variations in symmetry exist in every face that you'll see, there are some general guidelines regarding proportion that you need to observe and take note of if you want to create accurate faces:
- The human head is generally egg-shaped with a width of about five eyes wide and six to seven eye-widths long.
- The tops of the ears align where the nose meets the brow, while the bottoms of the ears align with the tip of the nose.
- The nose is about one eye in width and roughly one-and-a-half eye-lengths long from the inside corners of the eye.
- An equilateral triangle can be used to find the placement of the mouth: align the top corners of the triangle to the outer corners of the eyes. The bottom corner of the triangle is where the bottom of the mouth usually sits and the corners of the mouth should align with the center of the eyes.
3. Gender Differences
Differences in facial features exist on many levels between males and females. Male features tend to be larger and can at times be almost angular in definition, while female features tend to be smaller and curve-like in shape. A side-by-side comparison of a male and female profile helps illustrate this point.
4. Perspective
When drawing faces, it's important to remember that as the placement of the head is moved, so does its perspective. The head should be seen as a three-dimensional structure similar to that of a box. It has multiple planes with common edges and perspective lines that converge into vanishing points. This method allows you to see the exact size and placement of each feature in relationship to the overall shape and placement of the head.
5. Light And Shadow Shapes
Facial structure in a drawing or painting is defined through the contrasting tones of light and shadow. As light falls on the head, it creates areas of dark, mid and light values. These areas or 'shapes' are what help define its form.
6. The Eyes
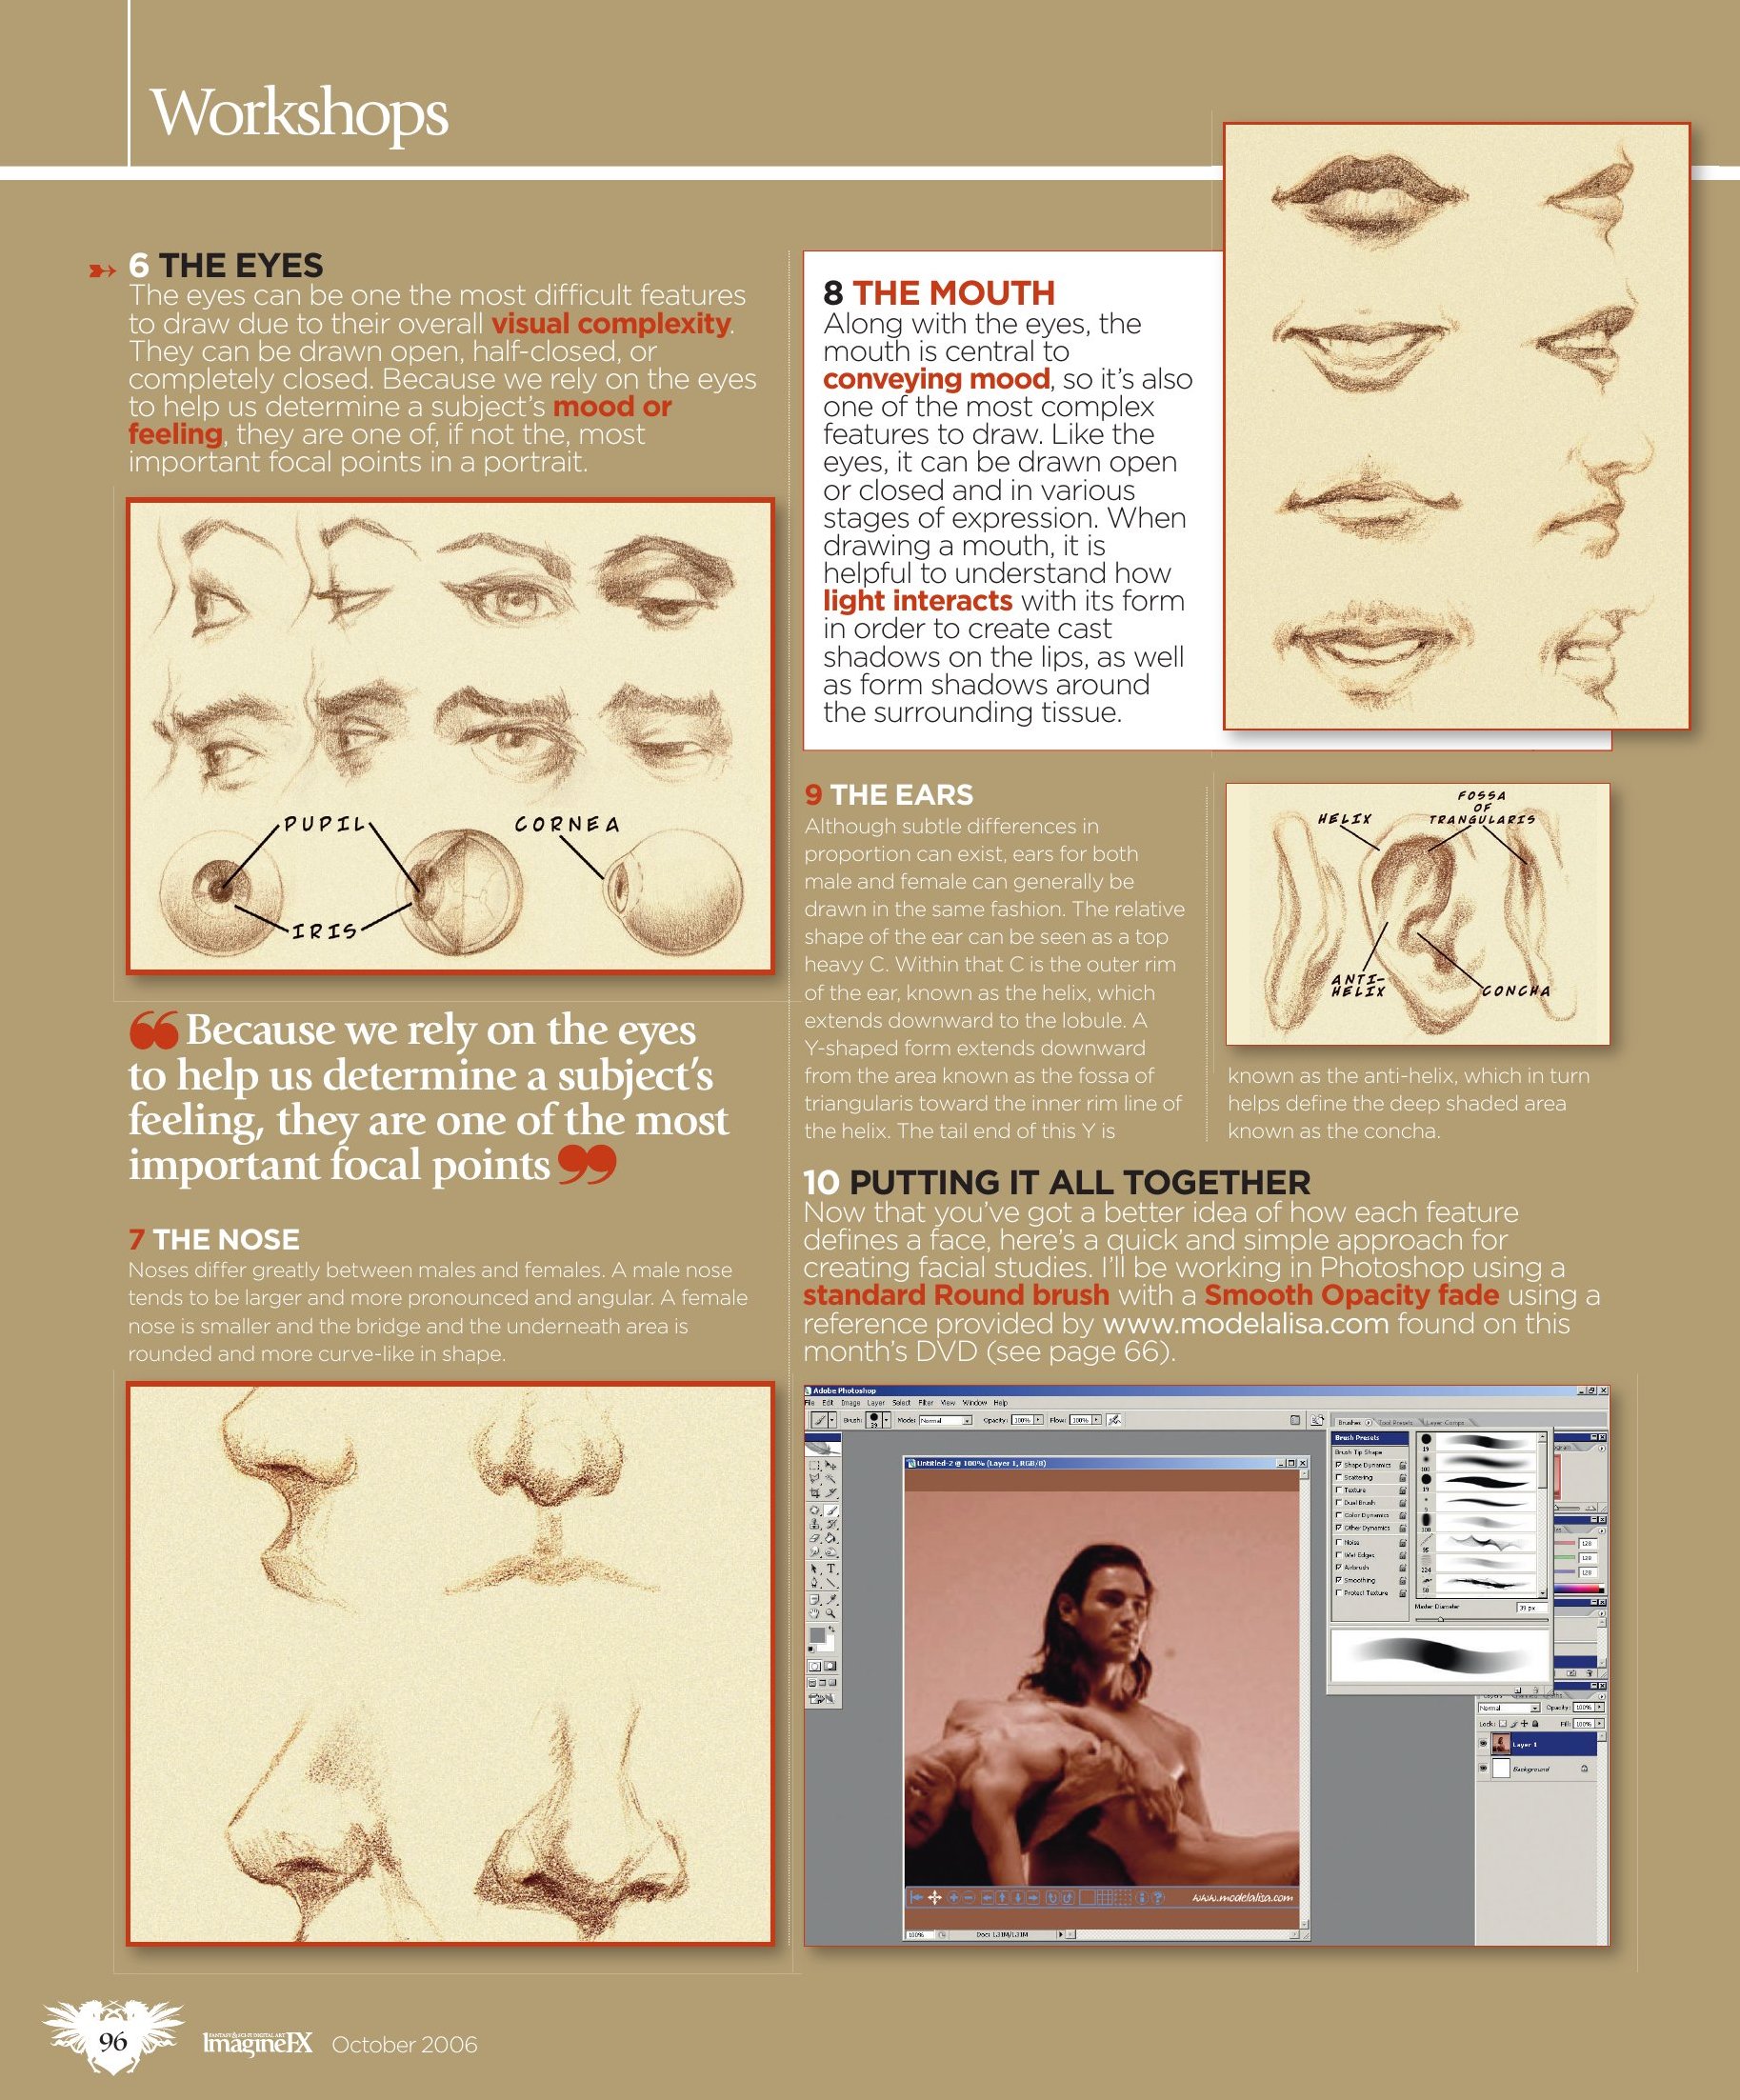
The eyes can be one of the most difficult features to draw due to their overall visual complexity. They can be drawn open, half-closed, or completely closed. Because we rely on the eyes to help us determine a subject's mood or feeling, they are one of, if not the, most important focal points in a portrait.
7. The Nose
Noses differ greatly between males and females. A male nose tends to be larger and more pronounced and angular. A female nose is smaller and the bridge and the underneath area are rounded and more curve-like in shape.
8. The Mouth
Along with the eyes, the mouth is central to conveying mood, so it's also one of the most complex features to draw. Like the eyes, it can be drawn open or closed and in various stages of expression. When drawing a mouth, it is helpful to understand how light interacts with its form in order to create cast shadows on the lips, as well as form shadows around the surrounding tissue.
9. The Ears
Although subtle differences in proportion can exist, ears for both male and female can generally be drawn in the same fashion. The relative shape of the ear can be seen as a top heavy C. Within that C is the outer rim of the ear, known as the helix, which extends downward to the lobule. A Y-shaped form extends downward from the area known as the fossa of triangularis toward the inner rim line of the helix. The tail end of this Y is known as the anti-helix, which in turn helps define the deep shaded area known as the concha.
10. Putting It All Together
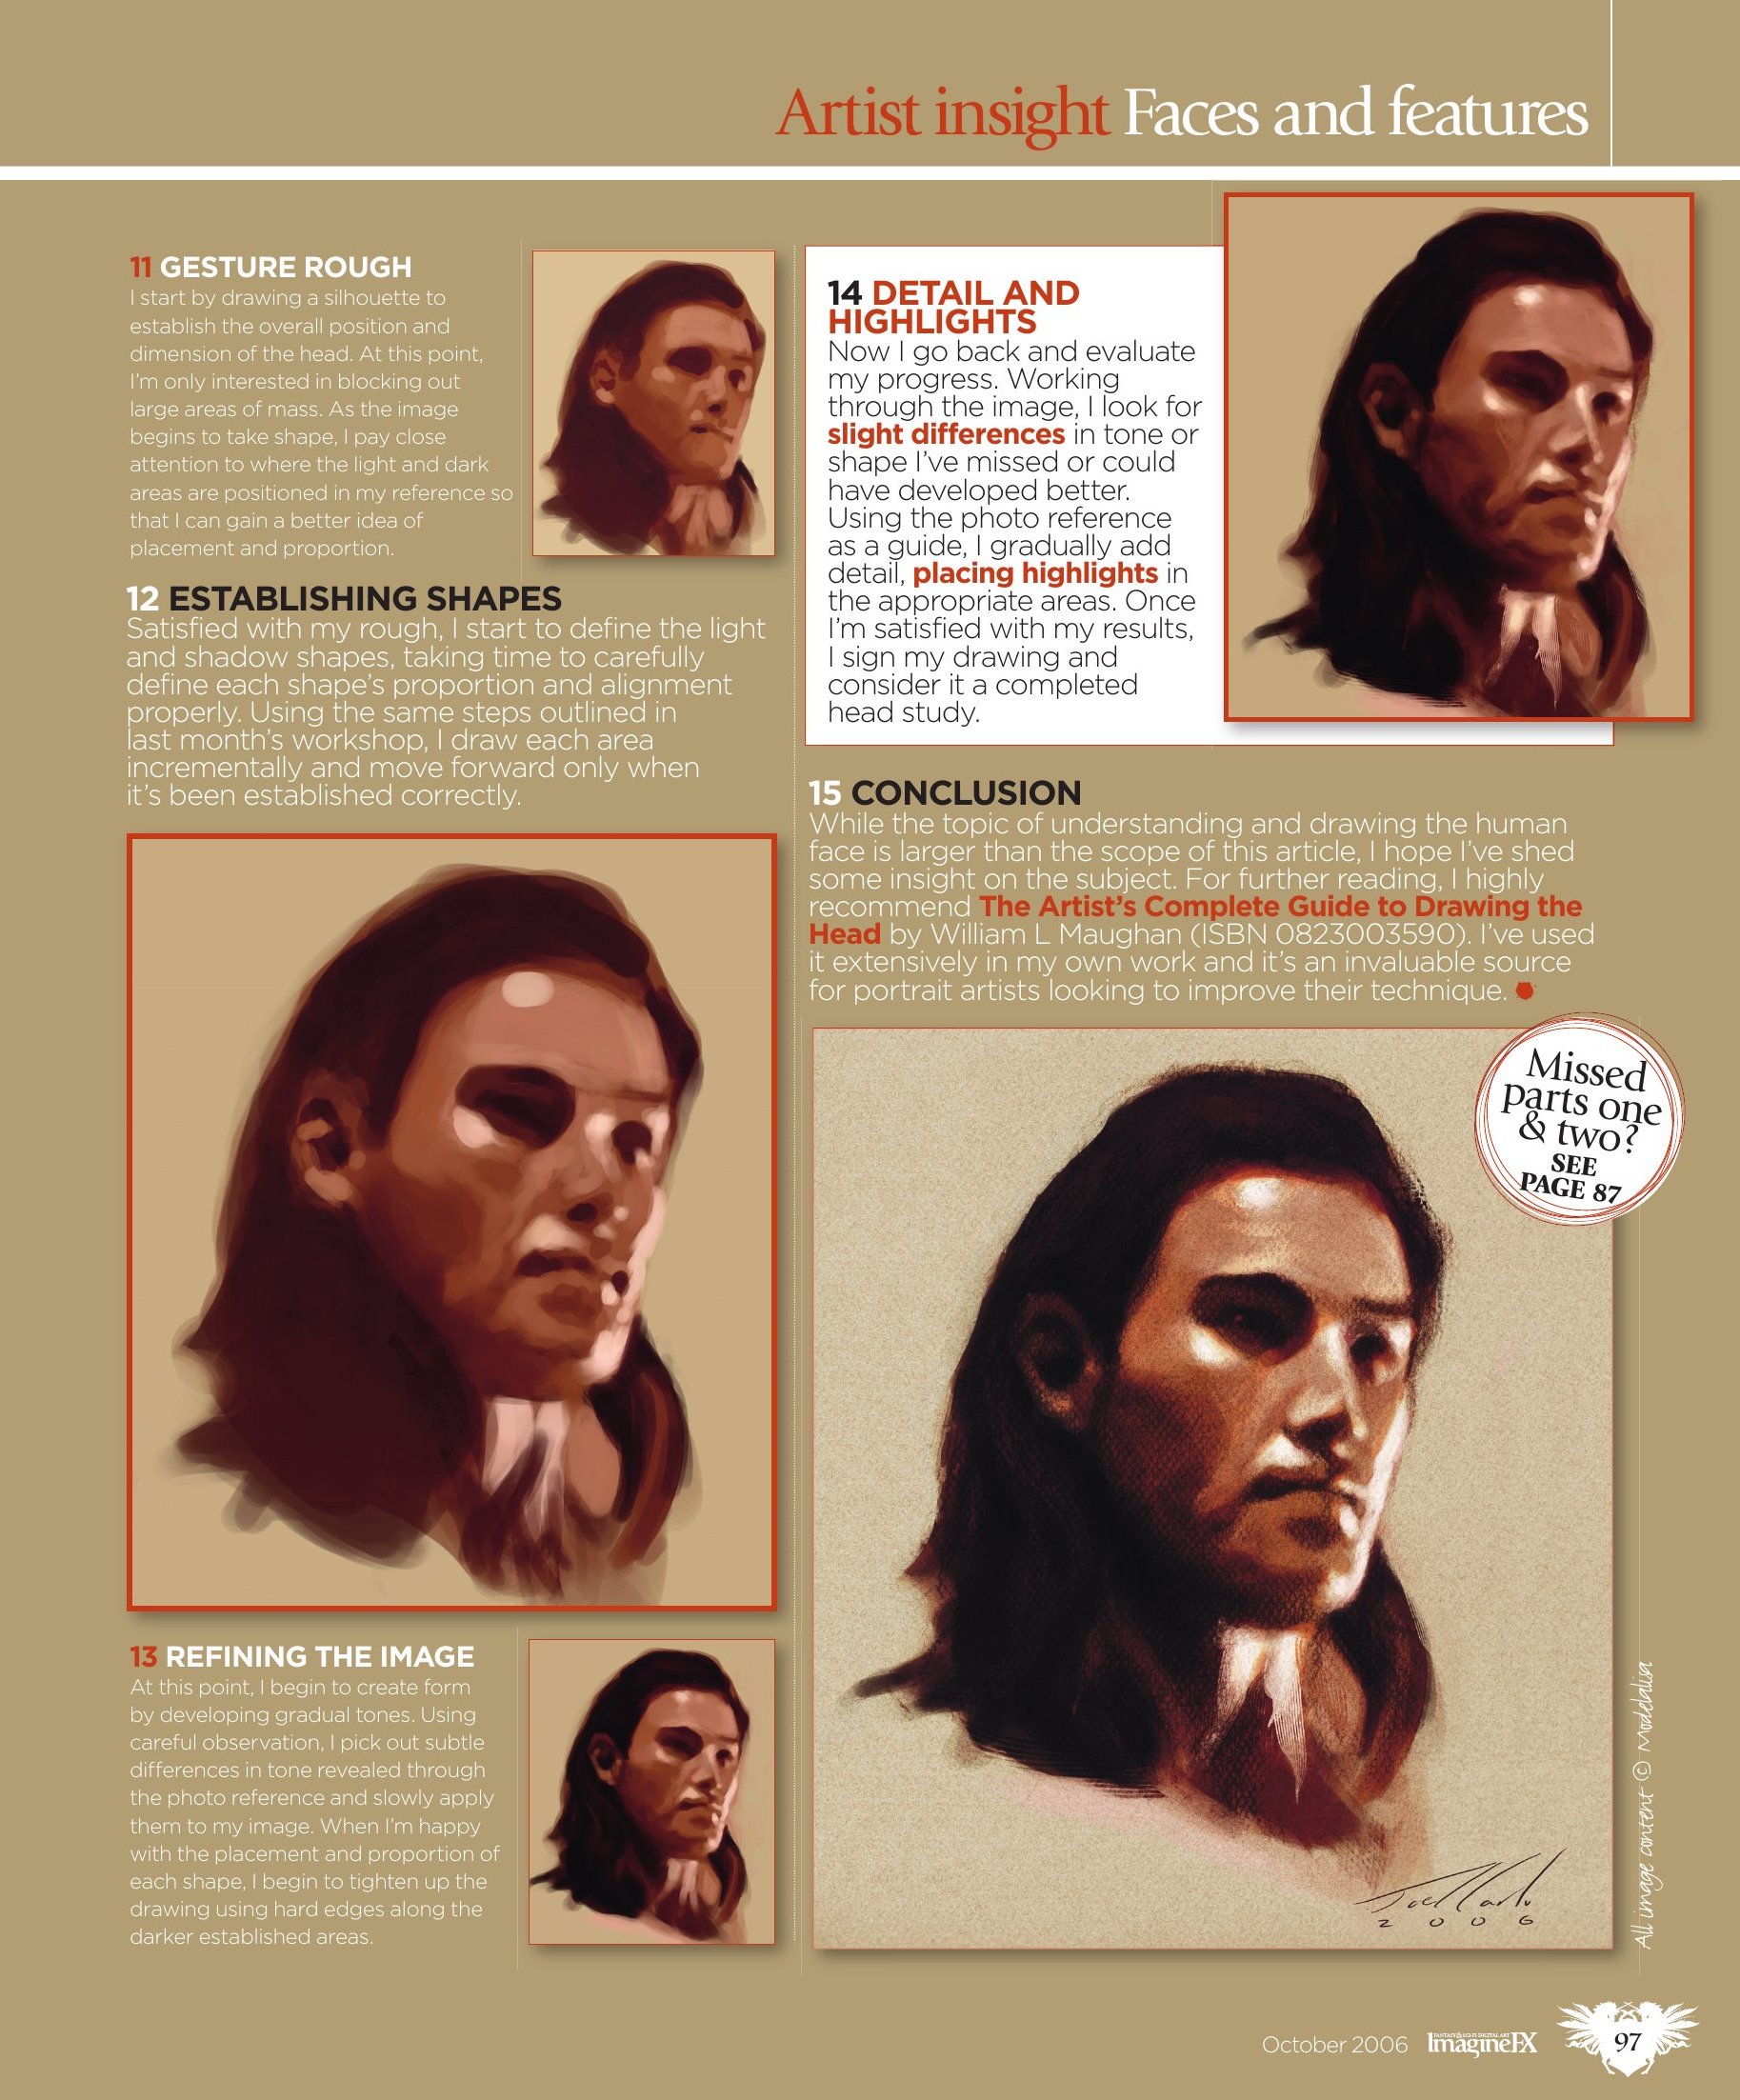
Now that you've got a better idea of how each feature defines a face, here's a quick and simple approach for creating facial studies. I'll be working in Photoshop using a standard Round brush with a Smooth Opacity fade using a reference provided by modelalisa.com.
11. Gesture Rough
I start by drawing a silhouette to establish the overall position and dimension of the head. At this point, I'm only interested in blocking out large areas of mass. As the image begins to take shape, I pay close attention to where the light and dark areas are positioned in my reference so that I can gain a better idea of placement and proportion.
12. Establishing Shapes
Satisfied with my rough, I start to define the light and shadow shapes, taking time to carefully define each shape's proportion and alignment properly. Using the same steps outlined in last month's workshop, I draw each area incrementally and move forward only when it's been established correctly.
13. Refining The Image
At this point, I begin to create form by developing gradual tones. Using careful observation, I pick out subtle differences in tone revealed through the photo reference and slowly apply them to my image. When I'm happy with the placement and proportion of each shape, I begin to tighten up the drawing using hard edges along the darker established areas.
14. Detail And Highlights
Now I go back and evaluate my progress. Working through the image, I look for slight differences in tone or shape I've missed or could have developed better. Using the photo reference as a guide, I gradually add detail, placing highlights in the appropriate areas. Once I'm satisfied with my results, I sign my drawing and consider it a completed head study.
15. Conclusion
While the topic of understanding and drawing the human face is larger than the scope of this article, I hope I've shed some insight on the subject. For further reading, I highly recommend The Artist's Complete Guide to Drawing the Head by William L Maughan (ISBN 0823003590). I've used it extensively in my own work and it's an invaluable source for portrait artists looking to improve their technique.